Pages

Thursday 27 June 2013

table saw

Table saw blade & Fence alignment.

Checking  blade alignment 

While finishing the set up on my mitre guide, I decided it's time to check the alignment of the saw blade with the mitre track for parallel to each other, plus while doing this I had better check to see if the table saw fence was also parallel with the blade, calibrating the saw table  top.

I tried using a micrometer I found this very fiddly to deal with  although I did get readings of within 0.25mm, but  the difference could have been me while fiddling.   I needed something to be accurate with out any doubt at all, I didn't want to  spend a fortune on other measuring equipment  it had to  simple, easy to set-up and cheap, so mulling things over and doing some web searching came up with this.

First simply  Colour mark  one tooth on the leading edge of the blade do this on  both sides of the  blade reason being  Ill show you a little later on.


It's just an off cut of timber it can be any length you choose it to be, I have screwed into the end  but off centre a small screw, as I wanted the measurement to be as near the table saw bed  as possible, The screw head  will be just touching the edge of the front tooth of the saw blade, now you can check you blade for  alignment with  the mitre  guide  by sliding it forwards to align with the back tooth on the saw  blade  while  at the same time ROTATE the blade  by hand  aligning the marked tooth  with the screw head when it's in  position at the rear of the blade, if it just touching the tooth , yippee , then your blade is fine, if not then your  saw blade is out of alignment.

I'm not going to try and explain how you go about re aligning you saw blades as I'm sure each manufacturer will possible  recommend  it's done differently as shown in there own  manuals.


I found this method to be simply in expensive and much  easier to use  than fiddling with a micrometer, lucky for me  my blade is spot on parallel  to the mitre track.

Checking  fence alignment

The preparation of your materials  is very important, it's no good preparing stock which is not cut parallel , it just is as important  to get this spot on as well as the mitre track being parallel  and your mitre fence being also square  to the blade. 

I'm using the same jig and the same method of checking  for  alignment it's primarily a repeat of what you just read to check the alignment of the  mitre gauge, only a slight difference I used a small steel square to keep the jig square to the fence as I checked it, seen here at the front  of the blade using the same marked tooth, now repeat at back of blade. 


Lucky for me  I can adjust my fence as seen here  with the four  Allen screws/bolts,  two either side of the fence , my fence was indeed out,   not by an enormus amount  but to much  to be ignored.


To make  adjustments slacken all four Allen screws, I simply used the jig  to align  the fence first at the back of the blade, by  placing  the screw head against the marked tooth  then slid the fence to touch the other end of jig  and mark a pencil line along the bottom edge of the fence onto the table saw bed then, I moved the jig to the front of the blade  rotated the blade  and moved the jig to the front of the blade placing  the screw head against the marked tooth, I slid the fence up against the other end of the timber jig ,  keeping it touching the timber  I then slowly move the  far end of the fence to line up with the pencil line I had made earlier and then tightened all four Allen screws.  I moved the fence in and out a few times and repeatedly checked it positions to double check for accuracy, all is fine. I removed the jig and left the fence in that position so I could cut some test pieces to double the test I had calibrated the saw correctly and no fine tuning would be needed.


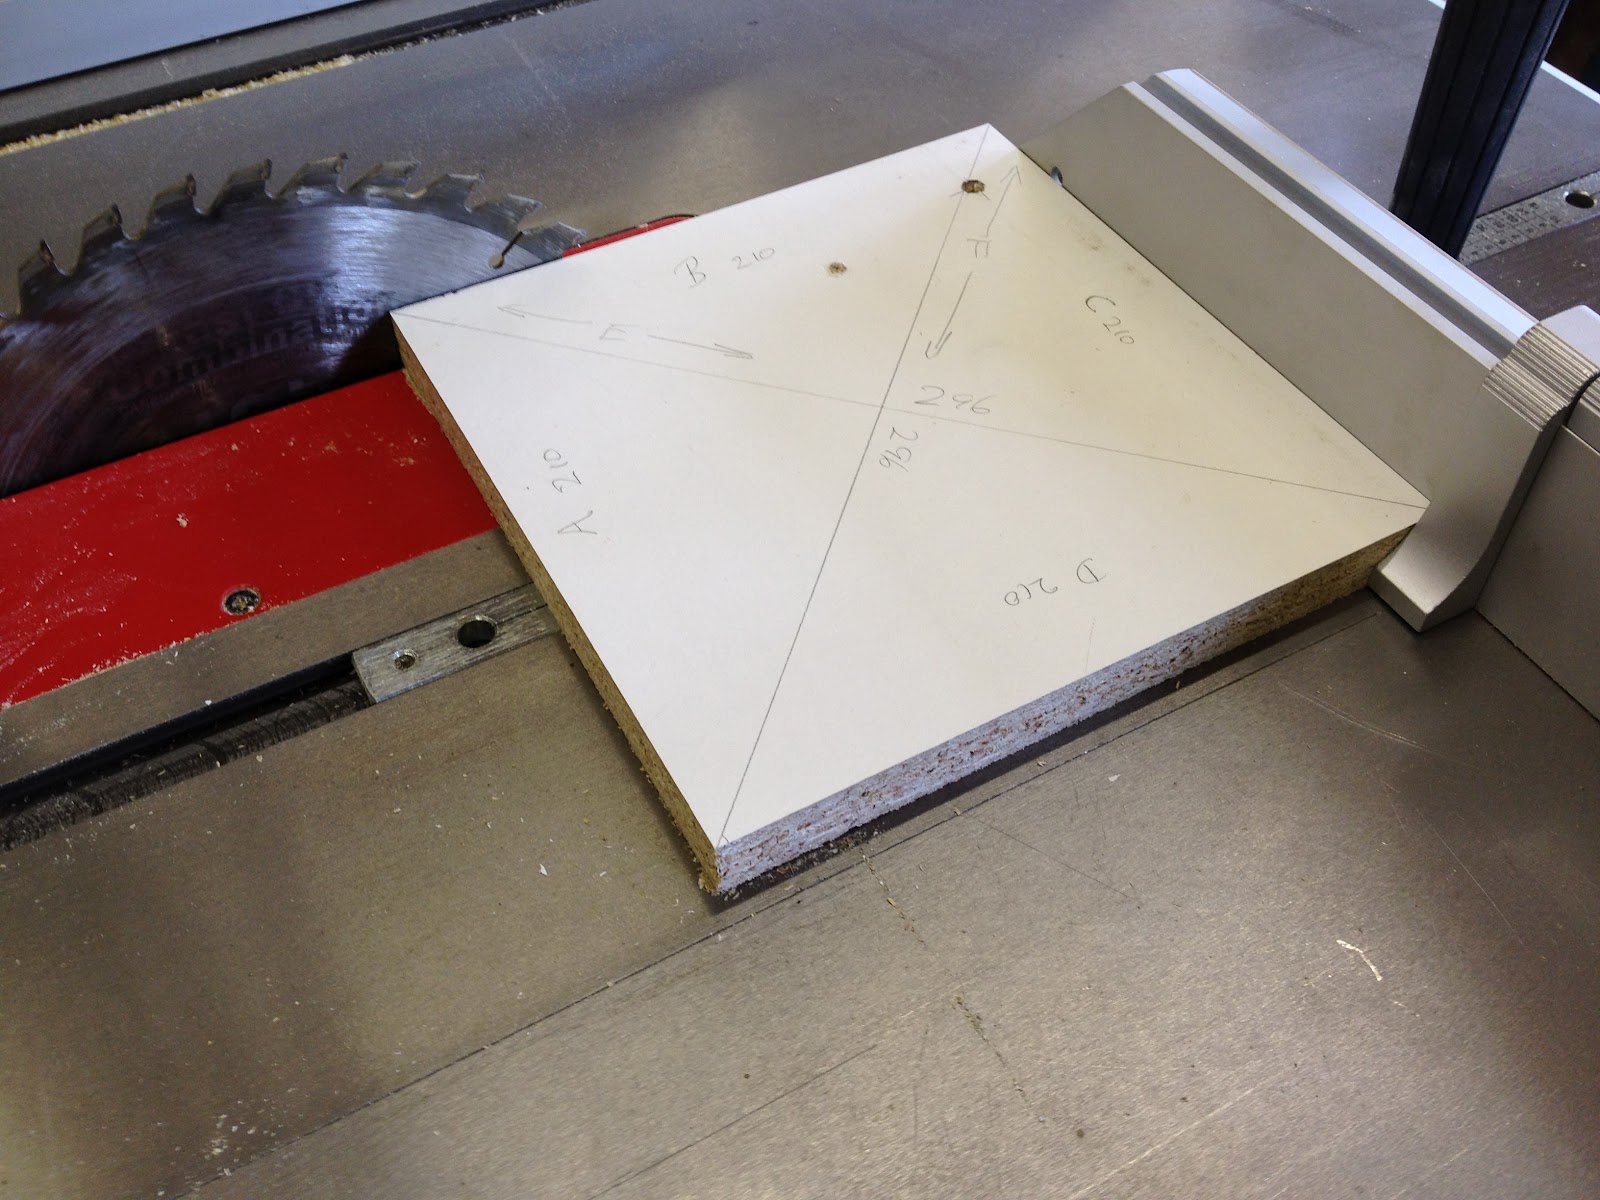
I planed one edge of some old white melamine chipboard  then rip cut it  and then cross cut at exactly the same length  as it's width  to get a square.  All four sides 210mm then as seen above marked the diagonals  both measured 296mm, spot on.


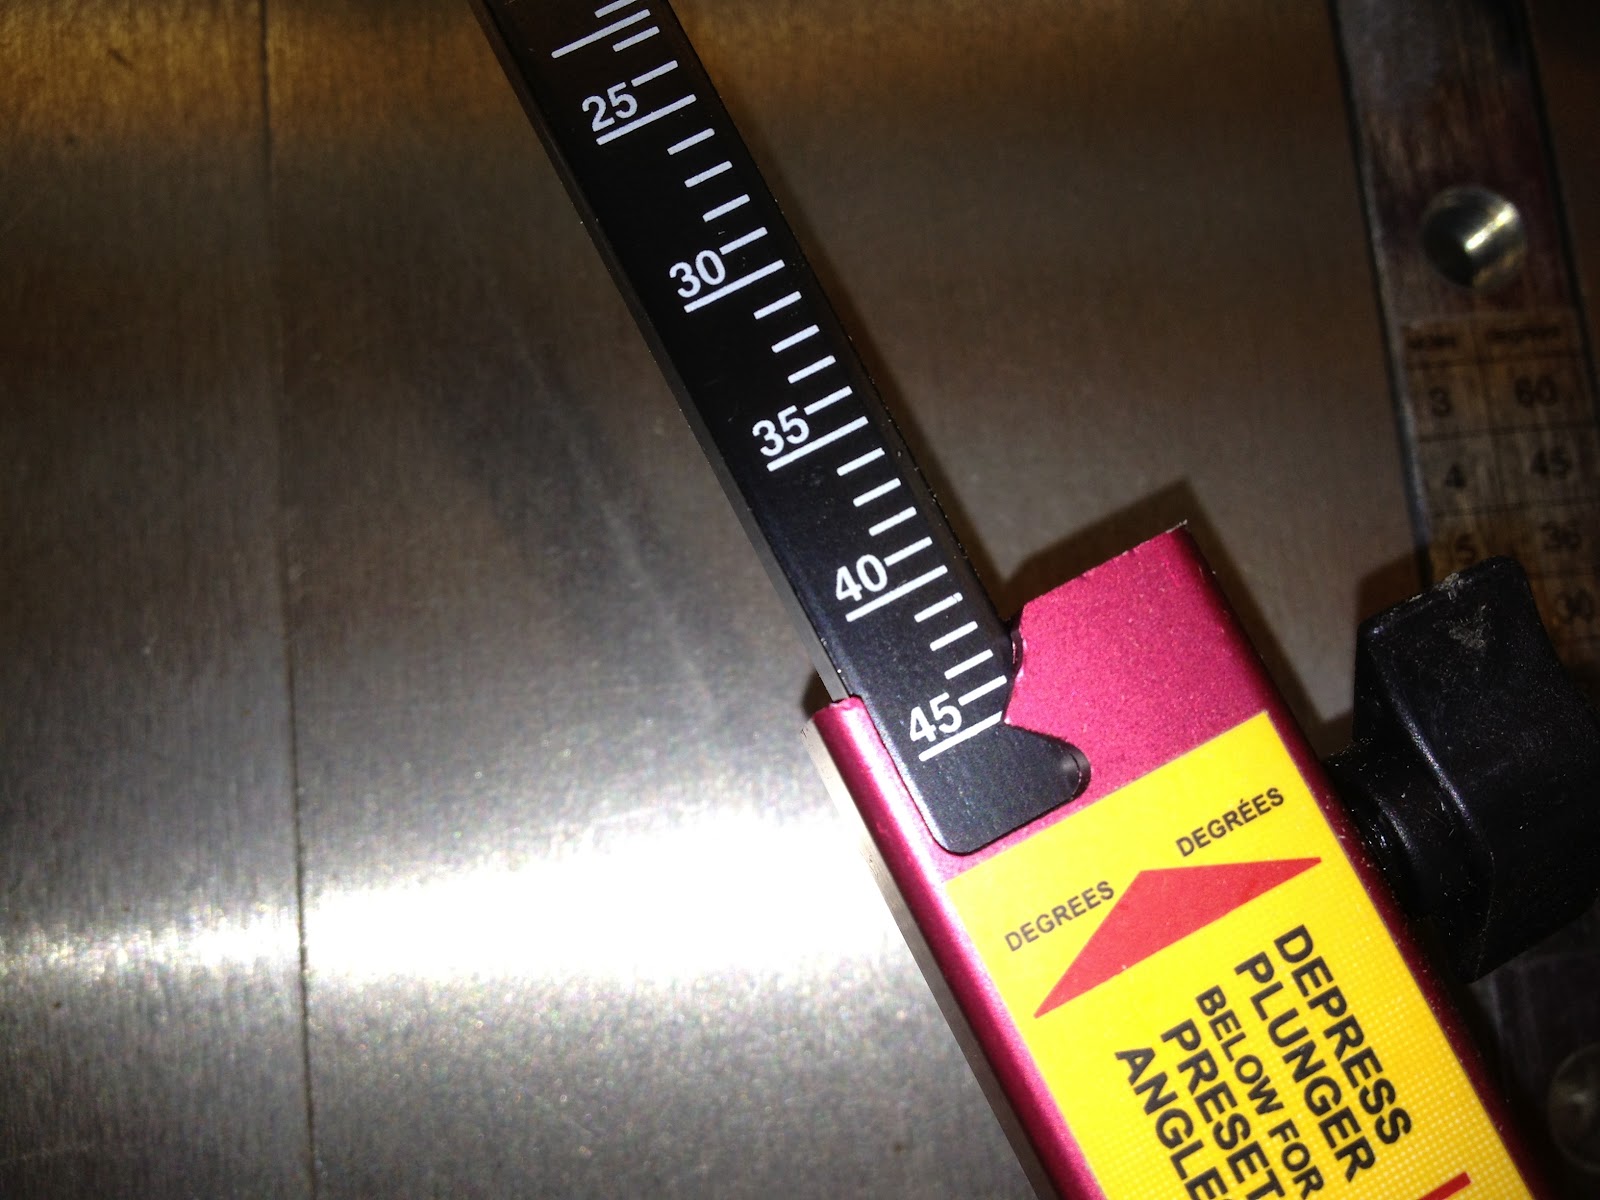
Now that I'm satisfied the  mitre  guide is square with the blade and the table saw fence is aligned with the blade  as well  it now time to try a cut  at 45 degrees,  Simple set up the 45 angle and hey presto. enjoy. hc 


Osborne eb3

Osborne  eb3  Review & Assembly.

Off 't to theworkshop early This morning  to open the box.

Just let me say here, I am not connected to Osborne in any way whatsoever,  nor with Axminster tools where I bought it from.  I don't have another mitre guide to compare the Osborne EB3 with, I only have a  bog standard mitre guide that came with my  Sip saw quite frankly it's total rubbish  so less said the better.

I haven't opened  the box till now, so your seeing  it at the same time as myself.  Well upon opening it I was pleasantly surprised on how well it was all packed into such a small box and all bubble wrapped as well , Osborne you definitely  went the extra  mile with your packing.


As I peeled open the bubble wrap it was soon obvious of the quality finished this product has, But  hey,  here is  the best surprise it was assembled in the box, nice, that was really nice. I was expecting bags of nuts and bolts with loads of components all needing to be assembled  with the aid of a Chinese manual, but no,  Also the manual is well written and well illustrated, simple to follow, idiots  proof guide.

Now here  I eat my own words read the the instructions from leaf to leaf first, I didn't, I should have,  it most definitely would have saved me a lot of time, checking and rechecking, before you  get carried away make sure you stick on the  the glide tap under the fence first, it raises the whole mitre gauge just  by a micro amount  so it sits the guide bar  correctly in the guild track at the right level. While your sticking this tap you just as well stick the black  self adhesive  abrasive to the front of the fence, leave the tap measure till later if you wish.   But follow the instruction carefully on that as well.

On the left as it came out of the box. All you needed to do from it's boxed position,slide one end of the guide bar into the table saw guide track and slide fully in, open it out and simple slide the inner brace arm into the outer brace arm, open a small packet containing the locking nut and thumb screw and assemble slide the arms together till it's at the  zero position 90 degrees compress the detent plunger located under the outer brace arm till it locks into it's degree setting hole, now tighten the side thumb screw this has now set the angle to a 90 degree triangle, Screw in the main handle as I forgot in the photo, don't forget it's washer,  now it's ready for it final adjustment to remove any slop on the guide rail in the table saw guide track.

To adjust the slop in the guide track   it has three grub screw set in the guide bar tightening them expands  the bar in the slot this removes all lateral side movements, now it's trial and error keep adjusting in or out  till there no lateral movement and the bar slides smoothly as is slides in and out of the guide track.  At this stage don't worry about setting it at  90 degrees to the blade, that will come a little later.

Here it is fully assembled and fitted into the guide track. The angle  settings are all marked just slide in or out  to select any angle and lock it.


Ok it,s now assemble use the micro adjuster to set it at  90 degree to the table saw blade, for this I used:-

I have a very large steel square that  I use for setting  ref points in the workshop.  I used it here  by placing  the stock against the blade making sure it touched the teeth at the front and back of the blade.  I then used the micro adjuster to set it spot on square.  To do this  as seen in the photo, I used the Allen (supplied) key and a19mm spanner slacken the grub screw in the top of outer arm turn the 19mm spanner to adjust till the fence moves  to the correct position and then  tighten  the Allen key.


Now is the time to fit the self adhesive tap to the top of the  fence, Simple slide the  mitre guide in past the edge of blade till the top of the fence is behind and  below a section of blade, now adjust fence sideways till it about 1 mm from edge of blade and lock in position.  Measure any distant in along the top  of fence from the blade I measured  250 mm  and mark a pencil line on the top of fence, peal of the back of the tap measure  and place the 250mm mark on the tap on the mark and stick down cut of any surplus from the ends.

Now that I have got  over the mistakes I made right from the start It's completely assembled  I have checked and double checked  the complete set up of the this mitre guide  before making any more cuts  in the timber.

Because of my mistakes I  was forced to check the blade and  table saw fence were parallel to the mitre guide track which they are, thank goodness. I  will show you how this was done but that will be another  review.


For now here is the finished cut, this was cut using a bog standard rip saw blade, I will refit my cross cut saw blade and see  if the cut improves even further.

IN CONCLUSION .

The Osborne  eb3 is a very robustly made  mitre gauge  it does exactly what the makers claim it's capable of in there video's and in there Write up's it has no flex in the triangular design at all.  once set up  and it's square to your blade you can look forwards to  cutting many thousands of mitres
knowing  the last one will be as accurate as the first.   It's  quickness at changing the mitre angles is simplicity itself , unlock slide  press the locking button and lock again, done, ready to go again.

Finally in the workshop  is a mitre gauge that will do what you want it to  produce a mitre that is spot on accurate each and every time you use it,  no more messing with a mitre gauge and then having to fiddle with the cut ends to get it  to fit correctly,  wasting time, which  for a professional joiner,  time is money.  Martin